Feature Updates 02/28/2026
Organize Your Store by Campus: Product Management Built for Multi-Site Ministry
What's New
You have products for your North Campus bookstore, your Downtown Campus coffee bar, and your South Campus event tickets. But until now, your product catalog treated them all the same -- no way to see which campus a product belongs to, no way to filter by location, no way to organize your store the way your ministry is actually structured.
Not anymore.
Your Products page now has full campus support -- assign products to specific campuses, see campus assignments at a glance, and filter your entire catalog by location. Plus, the Product Builder now includes powerful searchable dropdowns that make it effortless to find the right campus, MinistryPlatform product, or event without scrolling through long lists. And when you need to work with a specific product, the new action menu gives you instant access to checkouts, sales reports, and one-click duplication.
Where to Find It
These improvements are available across two areas of your control panel:
Payments > Products -- for the product list, campus column, campus filter, and action menu.
Payments > Products > Edit or Create -- for campus assignment and searchable dropdowns in the Product Builder.
Any administrator with Donor Admin or Payments Admin access can use these features.
See Which Campus Every Product Belongs To
The product list now shows a Campus column right next to the product name. Scan your catalog and instantly see which campus each product is assigned to -- no more guessing or opening each product to check.
Why it matters: When your worship pastor at the West Campus asks "Do we have any products set up for our campus?" you can answer in seconds. When you are preparing for a multi-campus event, you can see at a glance which campuses already have products configured and which ones still need setup.
Filter Your Entire Catalog by Campus
Click the search icon above the product list to open the Search Products panel. The new Campus dropdown lets you filter your entire product catalog by location. Select "All Campuses" to see everything, or pick a specific campus to narrow your view to just that location's products.
When a campus filter is active, a filter chip appears above the table showing the campus name -- click the X to clear it and return to the full list.
Why it matters: Your Downtown Campus staff no longer have to scroll through products from all five campuses to find their bookstore items. Your Children's Pastor can filter to their campus and see only the products they manage. Campus-specific product management just became simple.
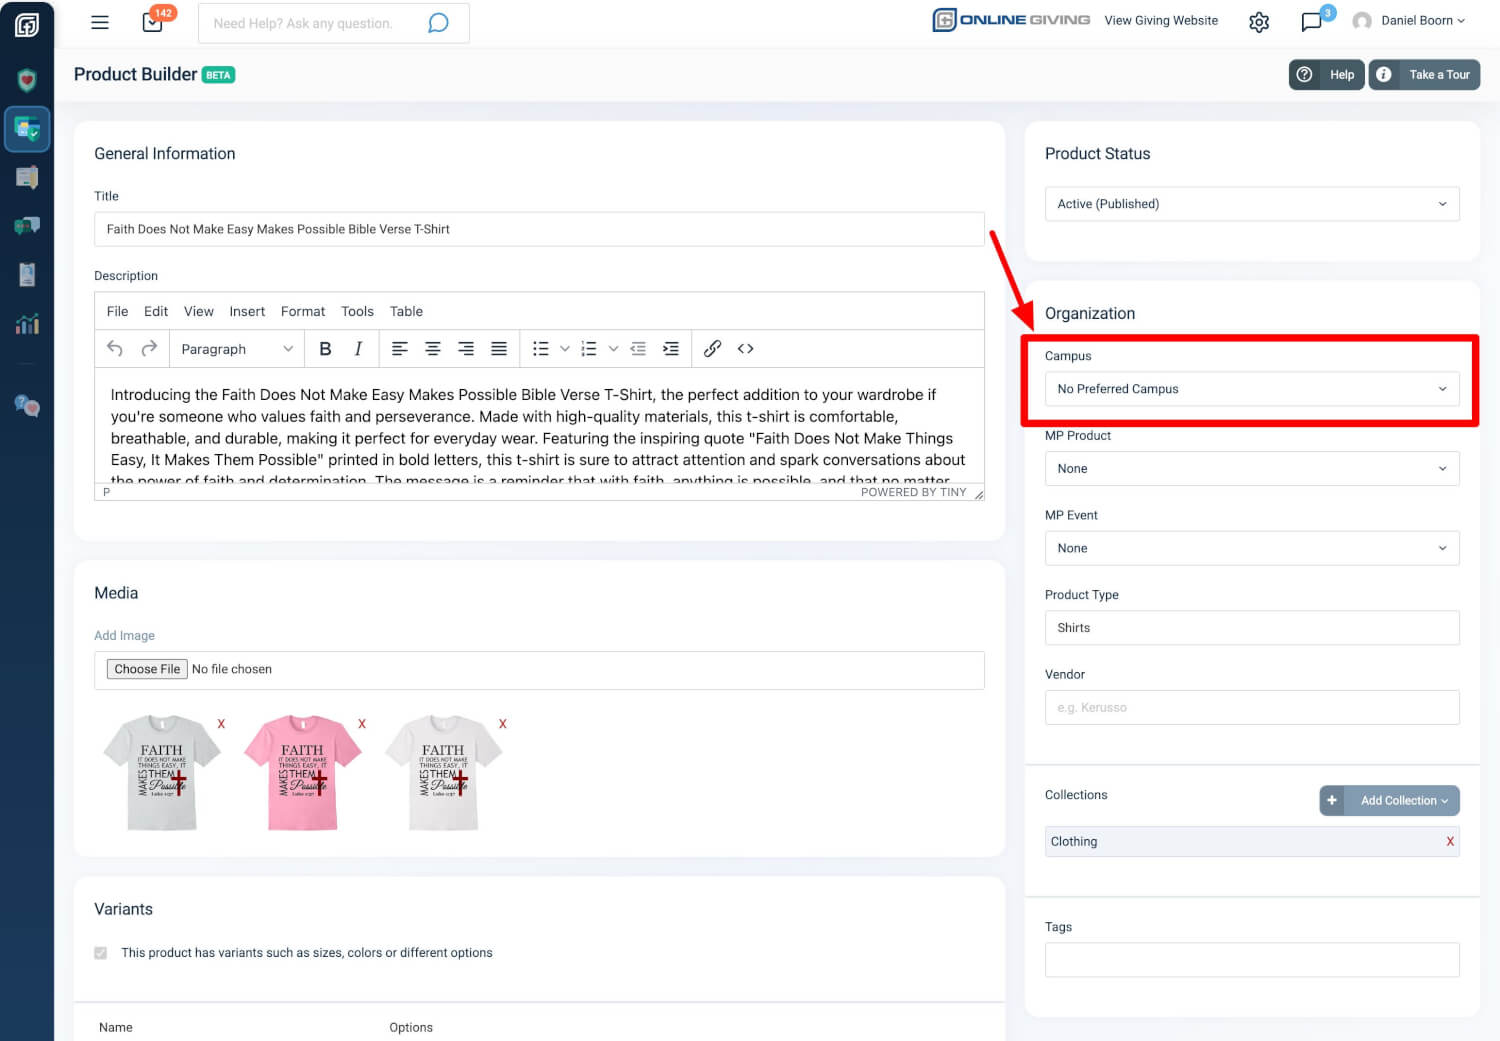
Assign Products to a Campus
When creating or editing a product, the Organization panel includes a Campus dropdown where you can assign the product to a specific campus. The dropdown is searchable -- just start typing the campus name to find it instantly, even if you have dozens of locations.
Why it matters: Multi-campus churches can now organize their product catalog the same way they organize their ministry -- by location. Campus-specific merchandise, event tickets, and resources can be clearly assigned and easily managed. When a campus launches a new initiative, their products are organized from day one.
One-Click Product Actions
Every product in your list now has a powerful action menu behind the gear icon. No more navigating away to find what you need -- it is all right there.
Copy Product
Need a new product that is similar to one you already have? Click Copy Product and the system instantly duplicates everything -- title, description, pricing, variants, collections, images, and campus assignment. The copy is created as a Draft so you can make your changes before publishing. This works perfectly for seasonal variations, campus-specific versions, or event merchandise that shares a common template.
View Checkouts
Want to see who has ordered a specific product? View Checkouts takes you directly to the Checkouts page, pre-filtered to show only orders that include that product. No more searching through all your orders manually.
Sales Report
Click Sales Report to jump straight to the Product Sales Report with that specific product already selected as a filter. Instantly see revenue, units sold, and order details for any product in your catalog.
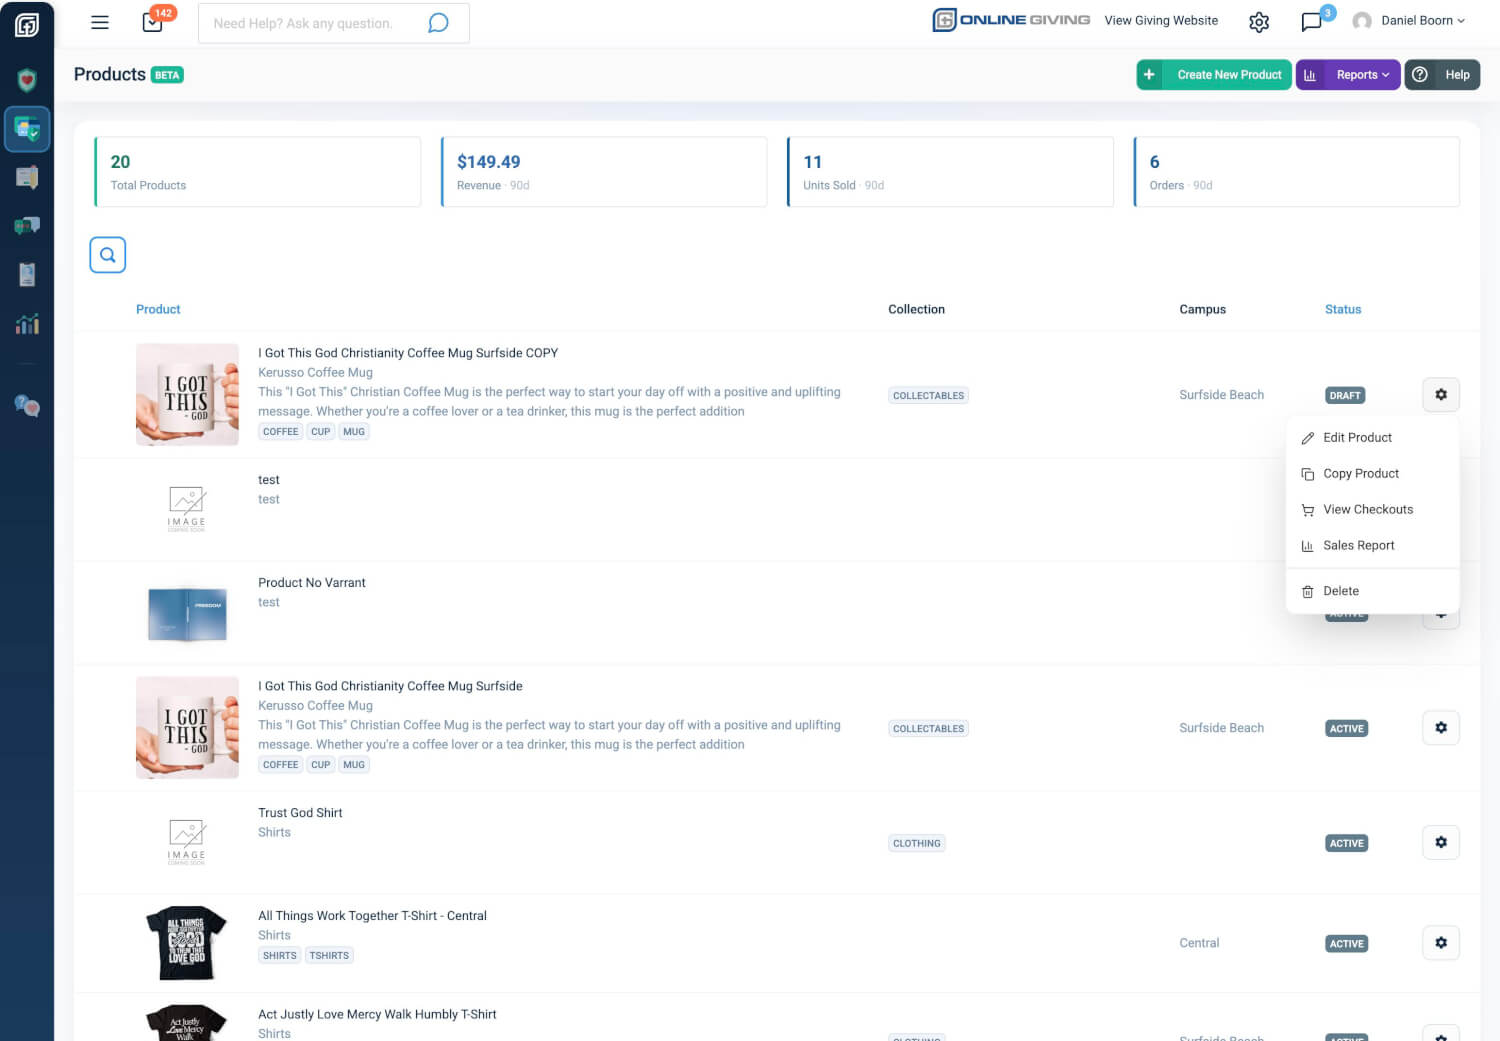
Why it matters: These shortcuts turn a multi-step process into a single click. Whether you are preparing for an event, checking fulfillment status, or reviewing sales performance, the information you need is always one click away.
Quick Start
Ready to try these new features? Here is how to get started:
- Go to Payments > Products to see the new Campus column and action menu
- Click the search icon above the table, select a campus from the dropdown, and hit Search Products to filter by location
- Open any product for editing and assign it to a campus using the searchable dropdown in the Organization panel
- Click the gear icon on any product to try Copy Product, View Checkouts, or Sales Report
At a Glance
- Campus Column: See which campus each product belongs to at a glance
- Campus Filter: Search and filter your product catalog by campus location
- Campus Assignment: Assign products to specific campuses in the Product Builder
- Searchable Dropdowns: Find any campus, MP product, or MP event by typing instead of scrolling
- Copy Product: Duplicate any product instantly -- variants, pricing, images, and all
- View Checkouts: Jump to orders for a specific product in one click
- Sales Report: See revenue and sales data for any product immediately